
The FlexRadio ships with the SmartSDR and SmartCAT products that enable WriteLog to control the FlexRadio as if it were an ordinary COM-port connected rig. That configuration works, but there is a lot more that WriteLog can do with the FlexRadio if you install its custom FlexRadio rig driver.
The distinguishing features of an SDR are that its processing algorithms are extremely configurable, and that it can share internal signaling with other programs (e.g. WriteLog.) These features are exploited by WriteLog’s FlexRadio Rig driver in order to blur the boundary between the contest logging program and the radio itself. This sequence of posts is designed to show how to configure Writelog to cooperate with the SmartSDR program that ships with FlexRadios, and to do so for a single operator in the shack. There are a number of details, so we start with the simplest configuration and progress up to the point of complete WriteLog SO2R station integration with a FlexRadio and, optionally, another radio.
These posts assume you have already installed WriteLog 11.27 or higher, and SmartSDR v1.4.16 or higher, along with the WriteLog FlexRadio Rig Driver 11.29. Here is a screen capture running a FlexRadio with WriteLog as a single operator, listening on one frequency at a time, with the additional option of split frequency operation.
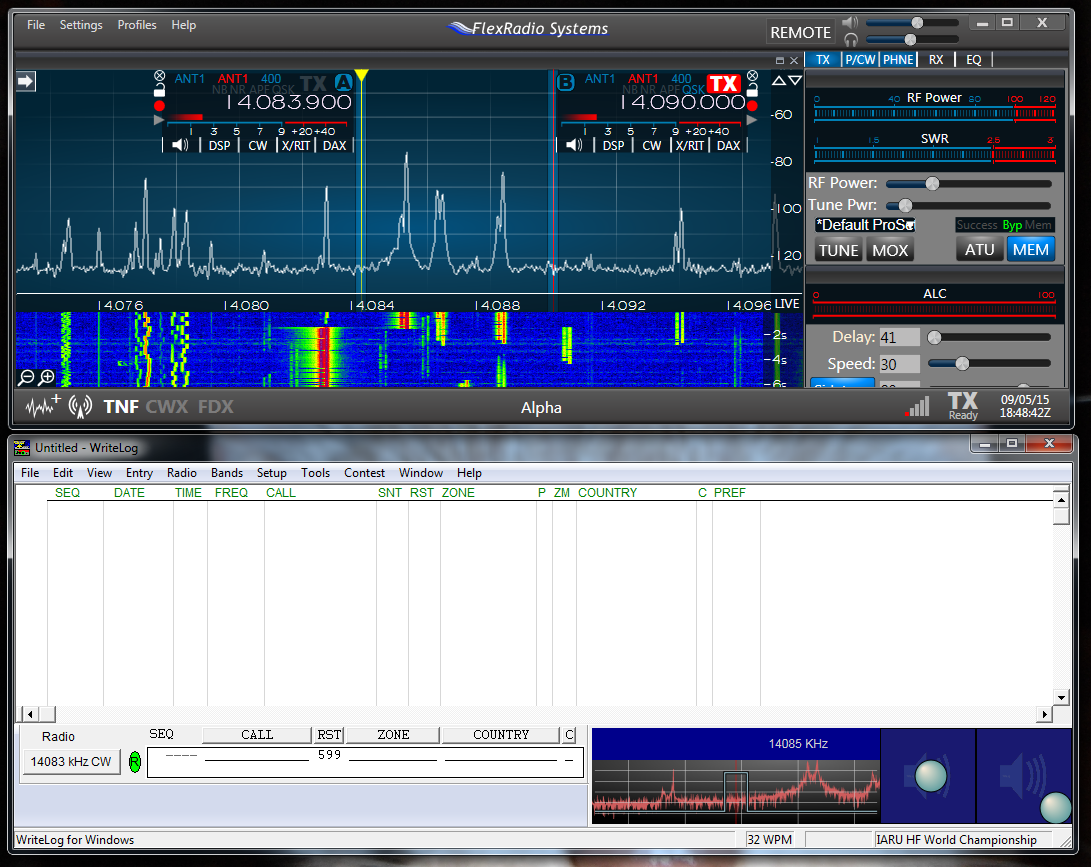
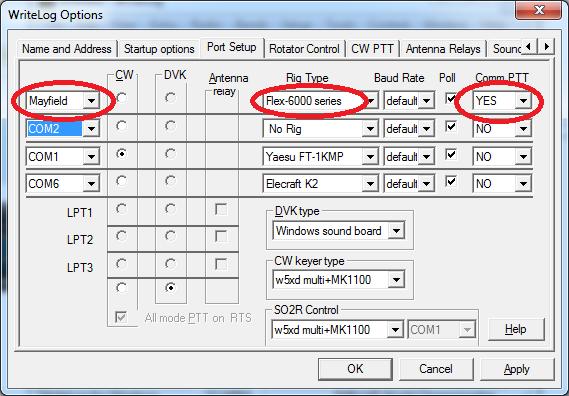
One of the first key points to understand is that WriteLog uses Slice A as its transceive frequency, or, for split frequency operation, Slice A for receive, and Slice B as transmit.The WriteLog and SmartSdr windows can be placed independently, but they are shown here over/under for ease of getting screen captures. To get the WriteLog FlexRadio rig driver to talk to your radio, use WriteLog’s Setup/Ports dialog and change one of the rows to “Flex-6000 series.”
Below is a diagram of the data flow for the SO1R configuration with a single radio, any Flex-6000 rig with WriteLog.
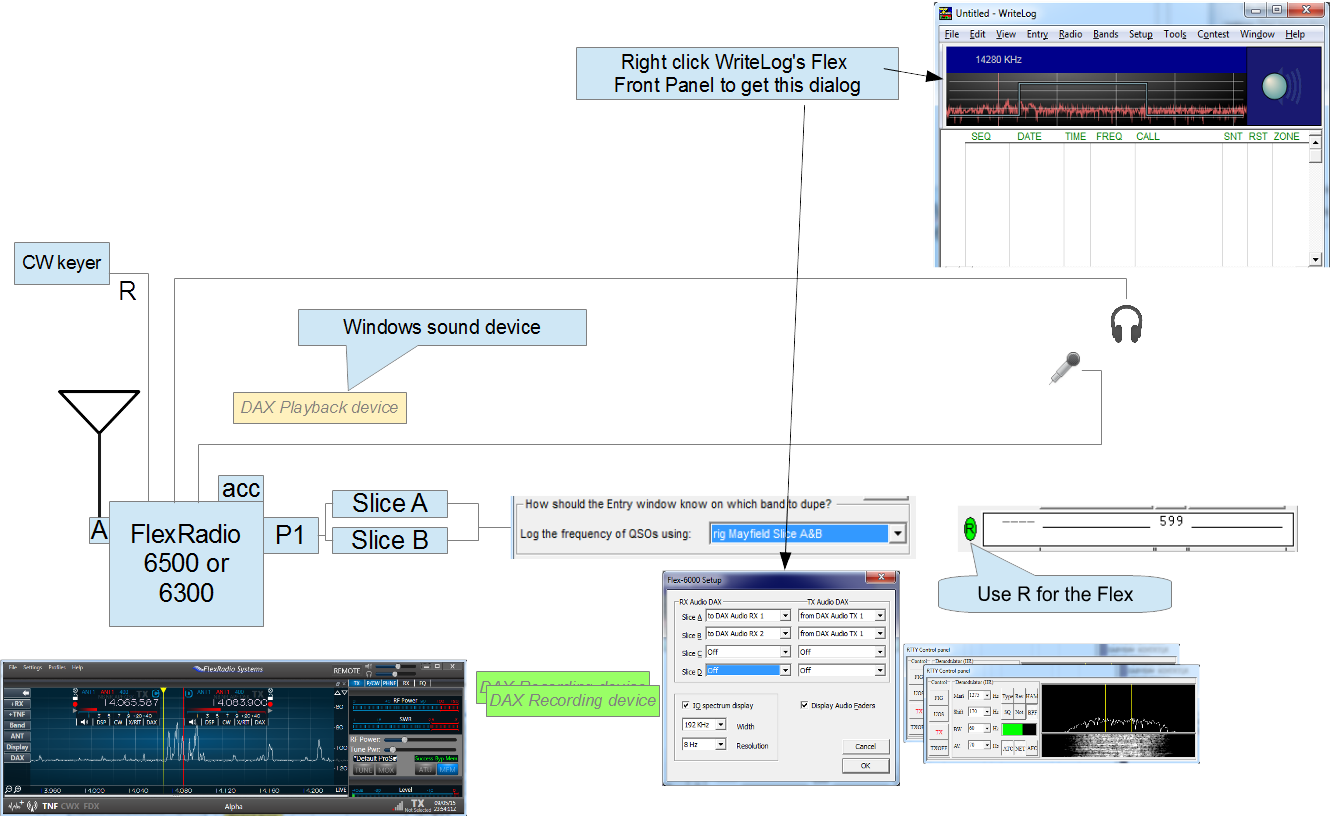
There is a lot of blank space in this diagram that will be filled in later diagrams, but all have essentially the same layout to help show the progression.
Here we show the station headphones and microphone connected to the FlexRadio’s front (or back) panel jacks. For digital operation, we have, for example, MMTTY. The picture shows WriteLog’s Flex-6000 Setup configured for DAX receive operation on Slice A and Slice B onto the Windows device DAX Audio RX 1 and RX 2, respectively. And WriteLog is set up to route AFSK audio on DAX Audio TX 1 to either Slice A, or to Slice B, which ever is set for Transmit in SmartSDR.
Two instances of MMTTY are shown for the case that you want to be able to decode on both your receive frequency as well as your transmit frequency when you do split frequency operation. One of the two RttyRite windows is “normal” and the other is setup as a receive-only “clone window” that copies on what is otherwise your transmit frequency.
There are some important details in the configuration that should not be overlooked:
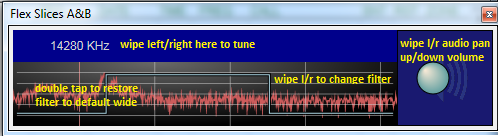
- If you are running on a touch-sensitive display, this panel is manipulated by touch gestures. Wipe the frequency left/right. Wipe the filter edges left/right, and drag the Audio pan/gain ball around its square.
- When operating split frequency, a second audio pan/volume control appears, and it corresponds to the Slice on your transmit frequency.
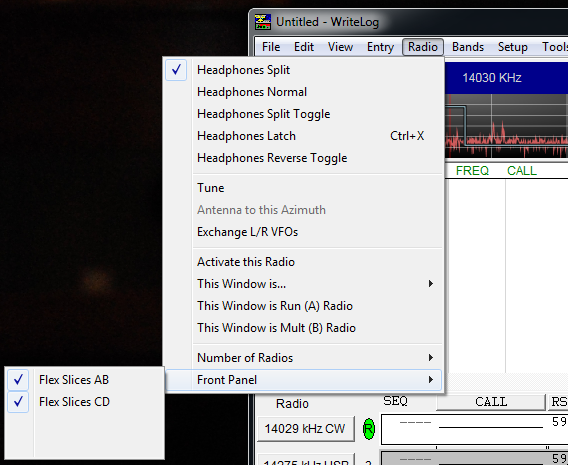
- For reasons that will become more apparent when we add more capabilities to the configuration, the Entry Window for the FlexRadio should be set to the Right window (as opposed to Left or 3 or 4)
- The WriteLog setup in the capture, “How should the Entry window know on which band to dupe?” is available when you click the Radio button on WriteLog’s Entry Window.
- WriteLog’s Flex-6000 dialog pictured has its DAX settings to off for Slice C and Slice D. Its not using them for this example so turning them off prevents consuming their bandwidth on the ethernet connection to the radio.
- Neither the Flex DAX Control Panel nor the Flex SmartSDR CAT are shown above. That is because WriteLog uses neither. You may safely right click on their icons in the Windows System tray and “Exit” them. If WriteLog is your only application interfacing with your Flex, then you can even go into Program Manager’s Startup folder and remove SmartSDR CAT, and DAX.
- The IQ Spectrum Display is turned ON and set to 192KHz. That spectrum display consumes 196K samples-per-second times 2 channels * 4 bytes per sample times 8 bits per byte, which is about 12 Mbps. The ethernet path from your Flex to your PC running WriteLog must support that bandwidth.
The FlexRadio rigs working in combination are more capable than this, and the more sophisticated configuration is discussed here. But, if you’re just getting started, it is recommend you get the above configured first to confirm that the basic hardware connections are in place.