WriteLog Remote Control adds a whole new set of useful features to WriteLog. A good way to gain an understanding of what it does is to try this exercise. You only need your WriteLog PC in your shack to try this out and see how it works. If you have installed the WriteLog unlimited edition, you already have everything you need, along with the necessary setup, to experiment with WriteLog Remote Cotrol.
- Run WriteLog. It does not matter what log you load or contest you select.
- Use Setup/WriteLog-Options/Remote-control.
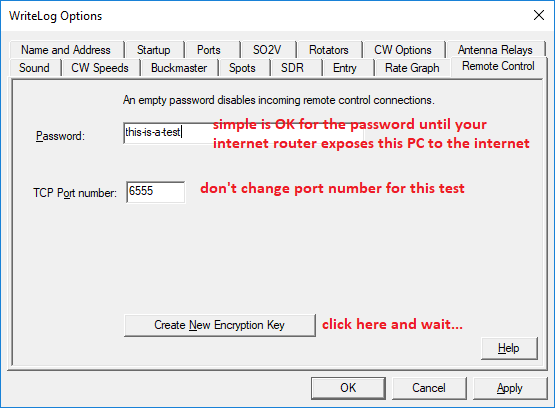
Set a password. Your home internet router firewall should not be forwarding outside connections to your WriteLog PC for port 6555, so the password you chose need not be particularly long or hard to guess. That comes later. Also click “Create New Encryption Key.” And wait. - Click OK.
- Leave WriteLog running. This is your normal WriteLog window but, under remote control, its called the “remote site.”
- Now play with the new stuff! Bring up the “control site.” How? You start with WriteLog’s Control Site desktop icon.
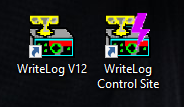
Its the one with the violet lightning bolt. - For this exercise, on WriteLog Control Site’s startup screen choose “New Log.” Next you next come to this WriteLog Control Setup screen.
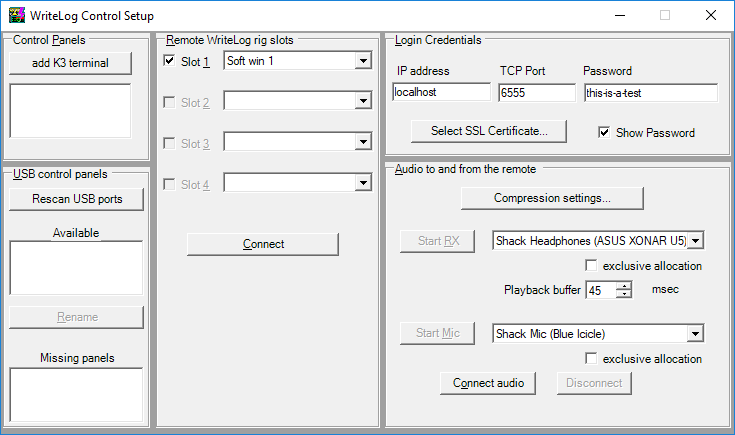
Leave the two Control Panels selectors at the left blank.- Enter the same password as back in step (2).
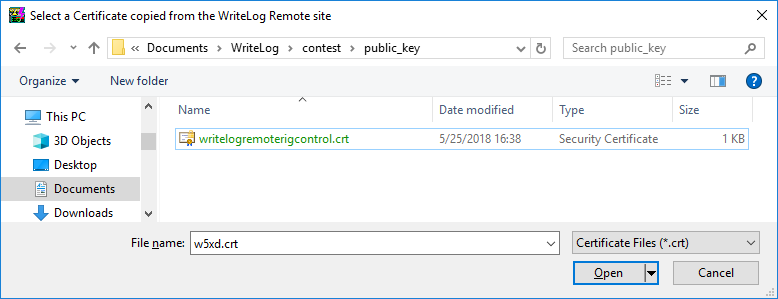
- Click on Select SSL Certificate. Unless you have modifed writelog.ini to put its data files elsewhere, you will find the right certificate in your Documents folder under WriteLog:
- Back on your remote site, surely you had Setup/WriteLog-Options/Ports arranged so the top row was a rig on a COM port? Click the “Slot 1” selector over to “Soft win 1” like I have in the above screen shot. If you have your rig set up on a different row than the first, then use the Soft win entry on the appropriate row. If you have multiple rigs set up at your remote, you can turn on more than one here, but I recommend you leave the SO2R setup to a later practice exercise.
- Also back at your remote site, do you have WriteLog’s Sound board mixer control routing receiver audio and/or mic audio? If so, now is the time to experiment with the lower right hand quadrant for selecting audio routing to the control site. Click on Connect Audio (lower right.) Then use either the Start Rx and/or the Start Mic buttons to flow the audio. Click on the various audio control buttons to get a feel for what they do. (Running the control site and remote site on the same PC per these instructions means you see the same audio devices here in WriteLog Control Setup as you did in the Sound Board Mixer setup. Its OK to select the same devices for control as were selected on the remote.)
- To continue on to exercise rig control, click the middle Connect button, choose your favorite contest, and click OK. The Control Site setup window closes.
- Now your WriteLog window comes up. But its a “Control Site” window (look at the caption bar.) It looks just like the remote site window that was already running, and it probably covers up the remote site window exactly (it shares some WriteLog.ini settings.) Move this new WriteLog Control Site main window so you can see both the control and remote sides at once. Something has happened to the remote site WriteLog window.
- Rig control is not fully set up on the control site yet. Make the control site see the rigs at the remote. On the WriteLog Control Site, use Setup/WriteLog-Options/Ports. On the control site (and only on a control site) the Rig Type selection now has a WriteLog Remote setting. That’s the one you want for this test. The COM port selection at the left will have Soft win 1. If back in step 7 you activated multiple Slots, they’ll all be available here and you can set up SO2R from the control site. I only show one in this example.
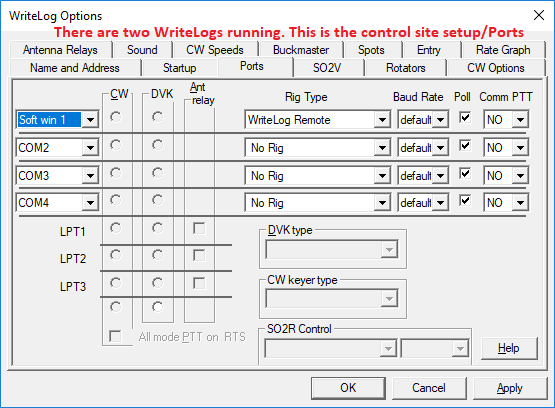
- You may safely use WriteLog Control Site’s Setup/Save-configuration to save the control site setup without damaging your existing WriteLog.ini. The control site uses different INI settings for Setup/Ports.
- Now try using the WriteLog Control site Entry Window to manipulate the “remote” rig. Type a frequency into the CALL and ENTER to tune the rig. Use the mouse wheel. And also notice the Control Site has put a new rig control window on your screen (if you used the Soft Win set up option.)
- Go back through the setup and try “Rem” instead of “Soft Win” to see it offers a subset of the rig control features. If you have a pair of K3’s you can experiment with using one in terminal mode to control the other. That’s in a later blog post.
